
 Pin it
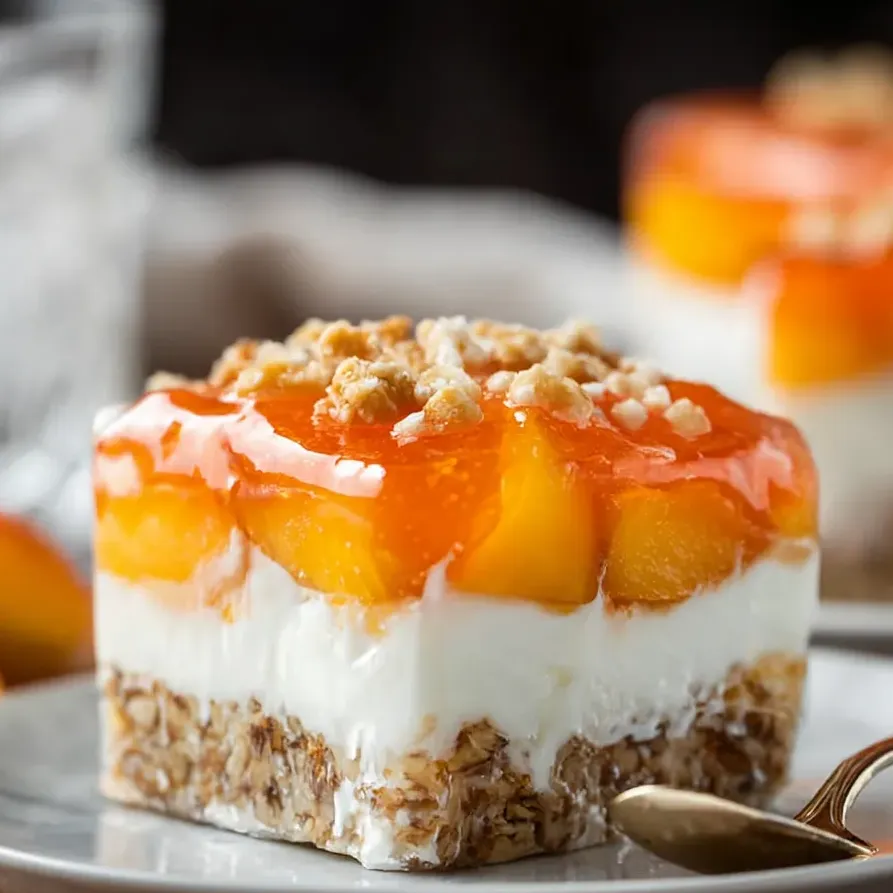
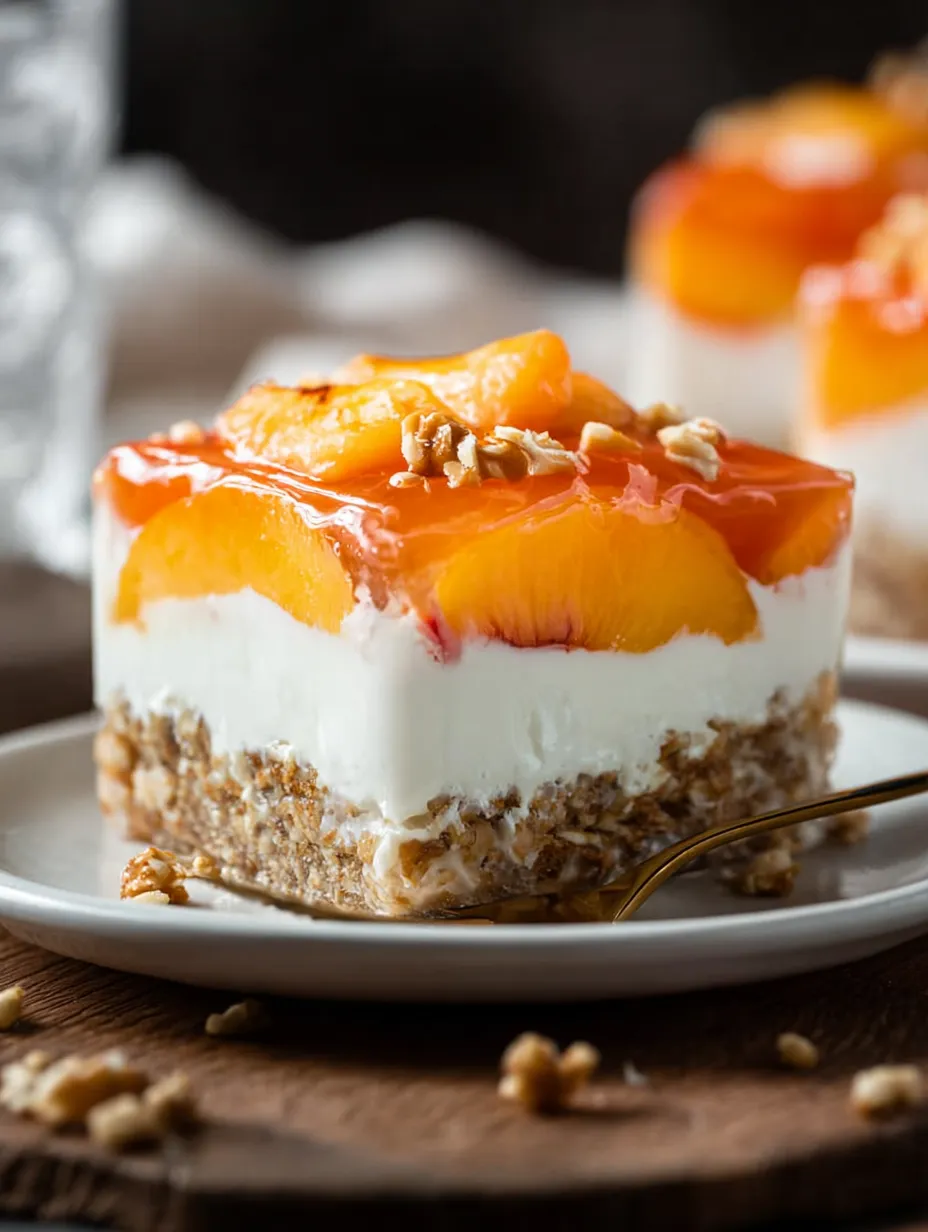
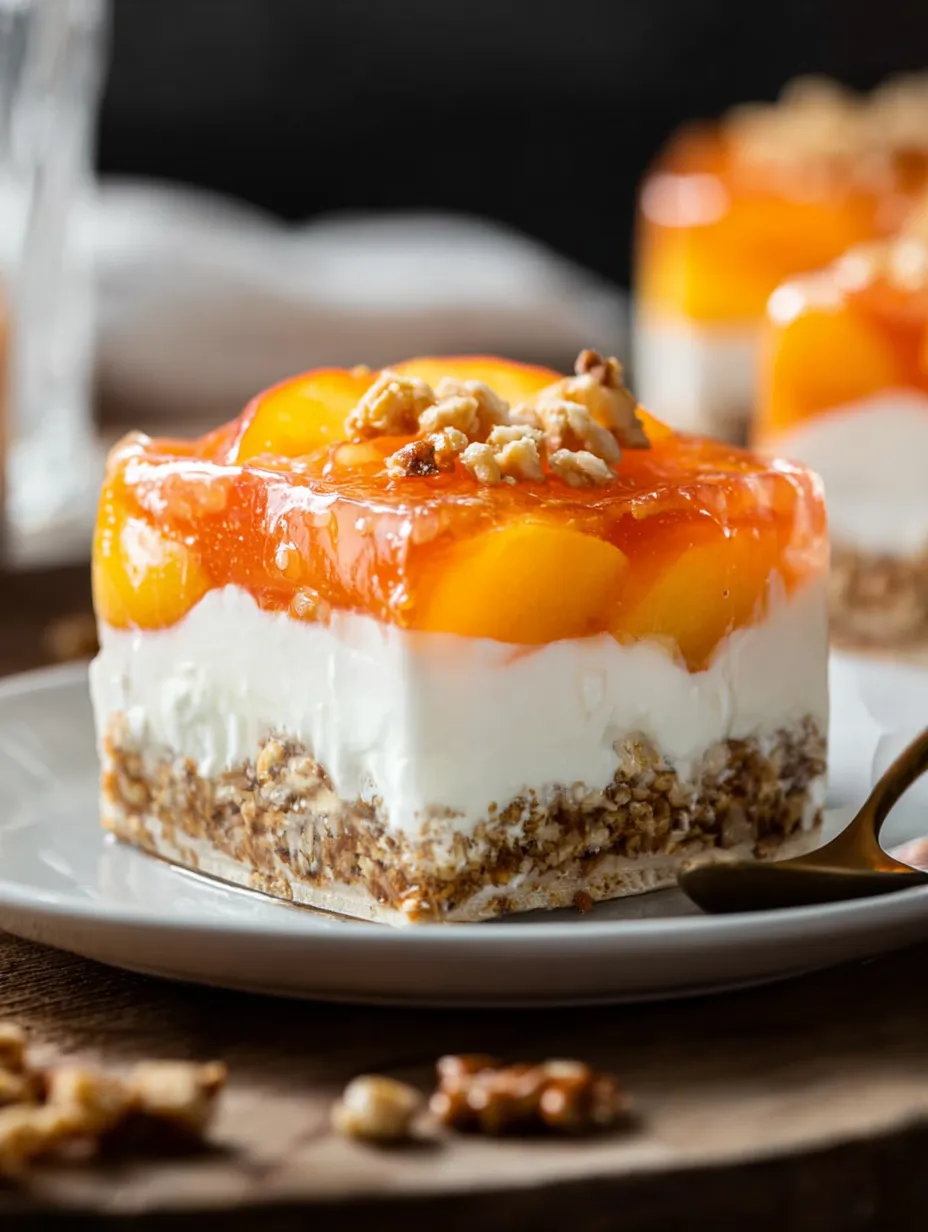
Bring a throwback vibe to any get-together with this chilled peach pretzel treat. You can put it together ahead of time, so it’s your pal for parties or picnics no matter when. It’s got layers! A salty buttery pretzel base, then a creamy middle, all topped off with juicy peaches inside wobbly peach-flavored gelatin. It’s sweet, salty, and super comforting—pure nostalgia on a plate.
The first time I had this at a summer backyard bash, I wasn’t sold on pretzels as a base. But honestly? One bite of that crunchy, buttery bottom and I was totally hooked. It’s now my number one for hot evenings all through peach season.
Luscious Ingredients
- Peach gelatin: brings that juicy stone fruit flavor to the top, check for freshness so it sets right
- Whipped topping: keeps the filling pillowy and easy to spread, be sure it’s well chilled
- Crushed pretzels: salty crunch is key, pulse them in a food processor for small bits
- Cream cheese: adds creaminess, go for full fat to keep it thick and smooth
- Boiling water and ice water: both go into the gelatin—don’t skip either step or you’ll mess up the texture
- Vanilla extract: helps everything taste rich and smell dreamy—real stuff is best if you have it
- Unsalted butter: melted butter means a crumbly delicious crust—good quality makes all the difference
- Fresh peaches: slice up juicy fruit with a bit of firmness; drained canned peaches work fine off-season
- Granulated sugar: sprinkles sweetness into the crust and the creamy layers, go for superfine if you can
Simple How-To
- Dive In and Enjoy:
- After it's set up, grab a sharp knife and slice into tidy squares. Keep it cold for the best texture. Fancy an extra touch? Add a bit more whipped topping when you serve.
- Add the Gelatin and Chill:
- Pour the peach and gelatin mix all over the cream cheese layer so everything’s even on top. Cover it up and chill in your fridge till solid and jiggly.
- Gelatin with Fruit:
- Mix your peach chunks into the cooled gelatin and pop it into the fridge. Let it sit until it thickens just enough so fruit floats instead of sinking.
- Get the Gelatin Ready:
- Tip the peach-flavored powder into a bowl. Add boiling water, stir hard till it’s all dissolved, then throw in some ice water to cool it down quick.
- Spread Out the Filling:
- Plop the cream cheese mix onto the chilled crust. Spread to every corner to seal that layer—it stops leaks and keeps your bottom crisp.
- Mix Up the Cream Cheese:
- Whip the soft cream cheese with sugar and vanilla until totally smooth. Carefully fold in the whipped topping so it stays fluffy.
- Cool and Bake:
- Bake the crust till the color deepens at the edges, then chill it out of the oven on a rack. Let it go totally cold before piling on any other layers.
- Put Together the Pretzel Crust:
- Stir the pretzel bits, sugar, and melted butter until every piece is slick. Press this into your pan: use your fingers or the bottom of a glass to make it tight and even.
- Get the Pan Ready:
- Set the oven to medium. Rub a thin layer of butter on the pan bottom and sides so your dessert pops out easily later on.
 Pin it
That mix of zippy cream cheese with cold, juicy peaches totally takes me back to huge family get-togethers in late summer. Pulling a chilled square right from the fridge is the best kind of summer throwback.
Chill and Store Smart
Leftovers? Pop them in the fridge covered. The peach and cream layers protect that crust from getting soggy for up to two days—after that, it softens a bit. If you’re working way ahead, stash only the bottom and cream cheese layers, then add your peach-gelatin right before serving.
Swap Out Ingredients
No fresh peaches? Grab canned (drain well!) or even use thawed frozen slices. Pat them dry before adding so your top sets up nicely. Cutting out dairy? Use your favorite plant-based cream cheese and whipped topping—easy!
How to Serve It Up
This chill treat is plenty rich all on its own, but you can scatter on chopped toasted pecans or a little grated white chocolate right before sharing. For fancier moments, serve each square with a swirl of whipped cream and a fresh mint leaf on top.
 Pin it
Backstory and Fun Facts
This sweet pretzel dish started in the Midwest back in the 1960s, showing up at every big family gathering and church picnic. Folks loved it because it’s simple to make for a crowd and doesn’t fall apart. The peachy twist came later, lightening up the classic strawberry version we all grew up with.
Frequently Asked Questions
- → Why seal the cream cheese layer to the crust?
This step keeps your pretzel bottom from getting soggy. If you don't seal it with the soft cheesy layer, the jiggly jelly leaks down and ruins the crunch.
- → How do I know when the peach gelatin layer is ready?
Once the gelatin is starting to set up and your peach pieces stay floating and not dropping to the bottom, you're good to go. That way, every piece has fruit all over.
- → Can I use canned peaches instead of fresh?
You sure can! Just make sure to drain canned peaches really well first. The taste and texture won't be quite the same, but it'll still be tasty.
- → Why use pretzels in the crust?
Pretzels add salt and crunch, so the creamy and sweet layers don't get boring. The combo makes every bite pop.
- → How long should the dessert chill before serving?
Let it hang out in the fridge at least a couple hours so the layers stay put. Slice when cold for neat squares and the best flavor.