
 Pin it
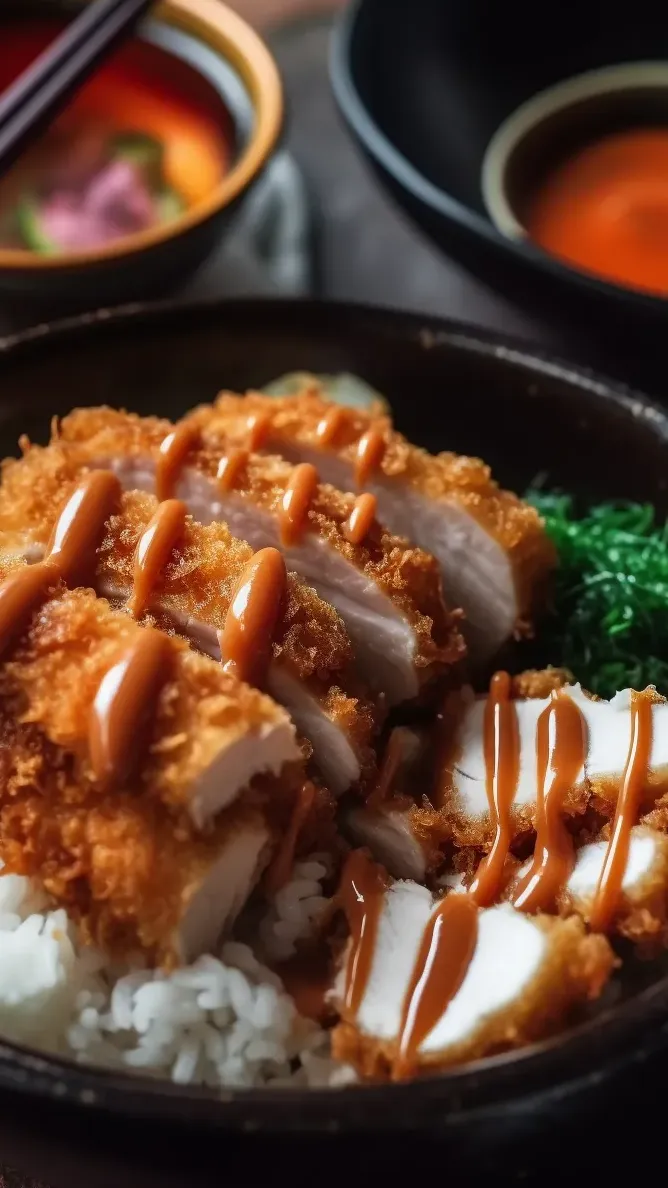
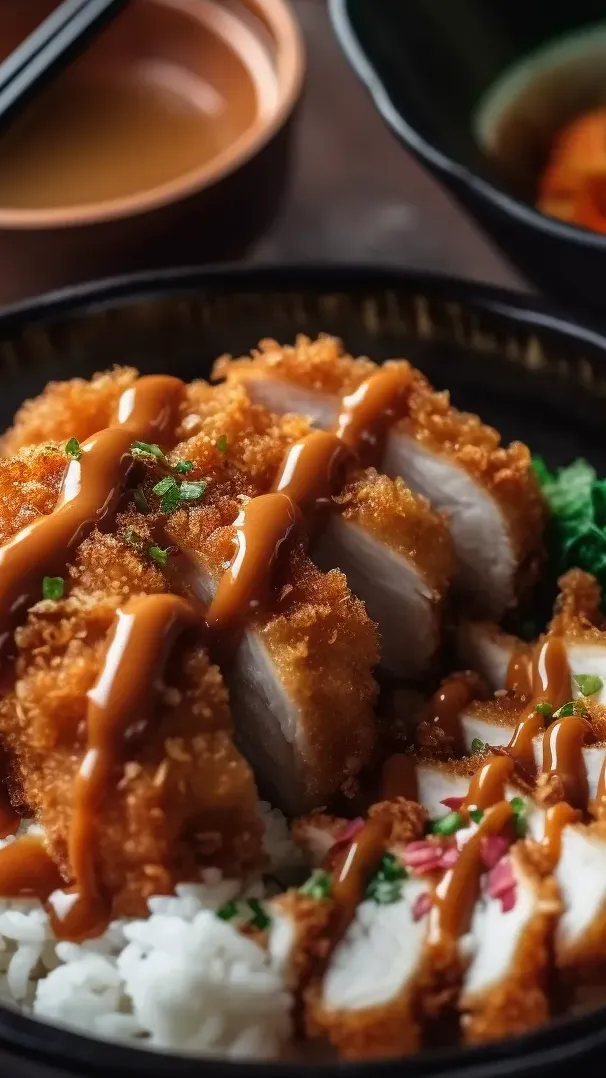
This Japanese staple has completely changed how I handle weekday meals, blending crunchy coated meat with that sweet and savory glaze. When you bite into that crispy outside and hit the soft meat inside, you'll swear you're eating at your favorite restaurant without leaving home.
I first tried katsu bowls on my Japan visit and I've been tweaking this dish ever since. Now my family asks for it every week and it's turned into our can't-miss Friday dinner that has everyone excited.
Ingredients
- Boneless pork loin cutlets or chicken breasts: pick cuts with a bit of fat running through them for the juiciest outcome
- Panko breadcrumbs: these Japanese breadcrumbs give you that amazing crunch that regular ones just can't deliver
- All purpose flour: creates the base layer that makes everything else stick properly
- Large eggs: acts as the crucial glue that makes the panko coating stick to the meat
- White rice: try using sushi rice if you can - its stickiness works perfectly with the crispy meat
- Tonkatsu sauce: this tangy-sweet topping is what makes the whole dish come together
- Frying oil: canola or vegetable oil won't burn at high heat, helping you get that perfect golden coating
- Fresh herbs: they're not must-haves but they'll add some nice color and freshness
Step-by-Step Instructions
- Prepare the Meat:
- Take your chicken or pork and flatten it to about half inch thick with something heavy like a rolling pin. This helps it cook evenly and stay tender. Add a good sprinkle of salt and pepper on both sides so the flavor gets right into the meat.
- Set Up Breading Station:
- Put out three shallow dishes in a row. Fill the first with flour, the second with beaten eggs, and the last with panko breadcrumbs. This makes everything flow smoothly. Try to use one hand for dry stuff and the other for wet stuff to avoid messy fingers.
- Bread the Cutlets:
- Start by covering each piece completely in flour and shake off what doesn't stick. Next, dunk it in the egg mixture and let the extra drip away. Finally, push it firmly into the panko so they stick all over with no bare spots showing anywhere.
- Fry to Perfection:
- Get your oil hot in a big pan until it hits around 350°F. You'll want about half inch of oil. To check if it's ready, drop in a few breadcrumbs - they should bubble right away. Cook chicken about 4 minutes on each side or pork for 3 minutes until it turns a deep gold color. Chicken should reach 165°F inside, while pork needs 145°F.
- Assemble Your Bowls:
- Put a nice bed of hot rice in each bowl. Cut the crispy meat into strips and place them on top of the rice. Pour plenty of tonkatsu sauce over everything so it runs down onto the meat and into the rice a bit. Add some fresh herbs on top if you want a splash of color.
 Pin it
The best thing about this dish is that first bite when you crunch through the super crispy outside and get to the tender meat inside. That mix of textures is why katsu is so hard to stop eating. I can still picture the tiny Tokyo restaurant where I first had this - the chef had spent his whole life making just this one dish.
Making Homemade Tonkatsu Sauce
Store-bought sauce works fine but making your own takes this meal to another level. You'll want to mix ketchup for sweetness with Worcestershire and soy sauce for that deep savory taste. Add more or less sugar depending on how sweet you like it. Some people throw in grated apple for natural sweetness too. If you make extra, it'll stay good in your fridge for two weeks in a sealed container, so it's worth making a bigger batch.
Perfect Rice Technique
Good katsu needs good rice underneath it. Wash your sushi rice several times until you don't see cloudiness in the water anymore. This gets rid of extra starch. Use just a bit more water than rice - about 1 to 1.1 ratio. After it's done cooking, don't open the lid right away. Let it sit for 10 minutes so the moisture spreads through all the grains. You'll end up with sticky but fluffy rice that goes great with the crunchy meat.
Katsu Bowl Variations
The basic katsu bowl has just rice and meat, but you can make it your own in lots of ways. Try adding some shredded cabbage for a fresh crunch - that's how they do it in Japan. You can also throw in some quick-pickled veggies or kimchi for a tangy kick. Many Japanese families pour curry sauce over their katsu instead of the regular sauce. And if you don't want to fry, you can bake your breaded cutlets at 400°F for about 20 minutes.
 Pin it
Frequently Asked Questions
- → Can I make katsu without frying?
Of course! To bake the cutlets, brush or spray them lightly with oil and cook in a 400°F (200°C) oven for 20-25 minutes. Flip them mid-way for even cooking. While they won't be as crispy as frying, the flavor still shines through.
- → What pairs well with katsu meals?
Try shredded cabbage, Japanese pickles, cucumber salad, or miso soup for sides. Steamed options like broccoli or edamame can round out the bowl if you like extra veggies.
- → Can I prep katsu bowls in advance?
For sure! Coat the meat with breading ahead of time and pop them in the fridge for a few hours to fry later. The sauce can be prepared a week early and stored in the fridge.
- → What's the difference between chicken katsu and tonkatsu?
The type of meat! Chicken katsu uses chicken, and tonkatsu is all about pork. The rest of the breading and sauce process stays pretty much the same.
- → How do I make gluten-free katsu?
Swap the flour for rice flour or a gluten-free mix. Go for gluten-free panko and make sure the soy and Worcestershire sauces you're using are certified gluten-free options.
- → How can I tell if the oil's ready to fry?
You can check by tossing in some breadcrumbs. If they crackle and rise to the surface quickly, you're good to go (350°F/175°C). If they sink or burn, you'll need to tweak the heat a bit.