
 Pin it
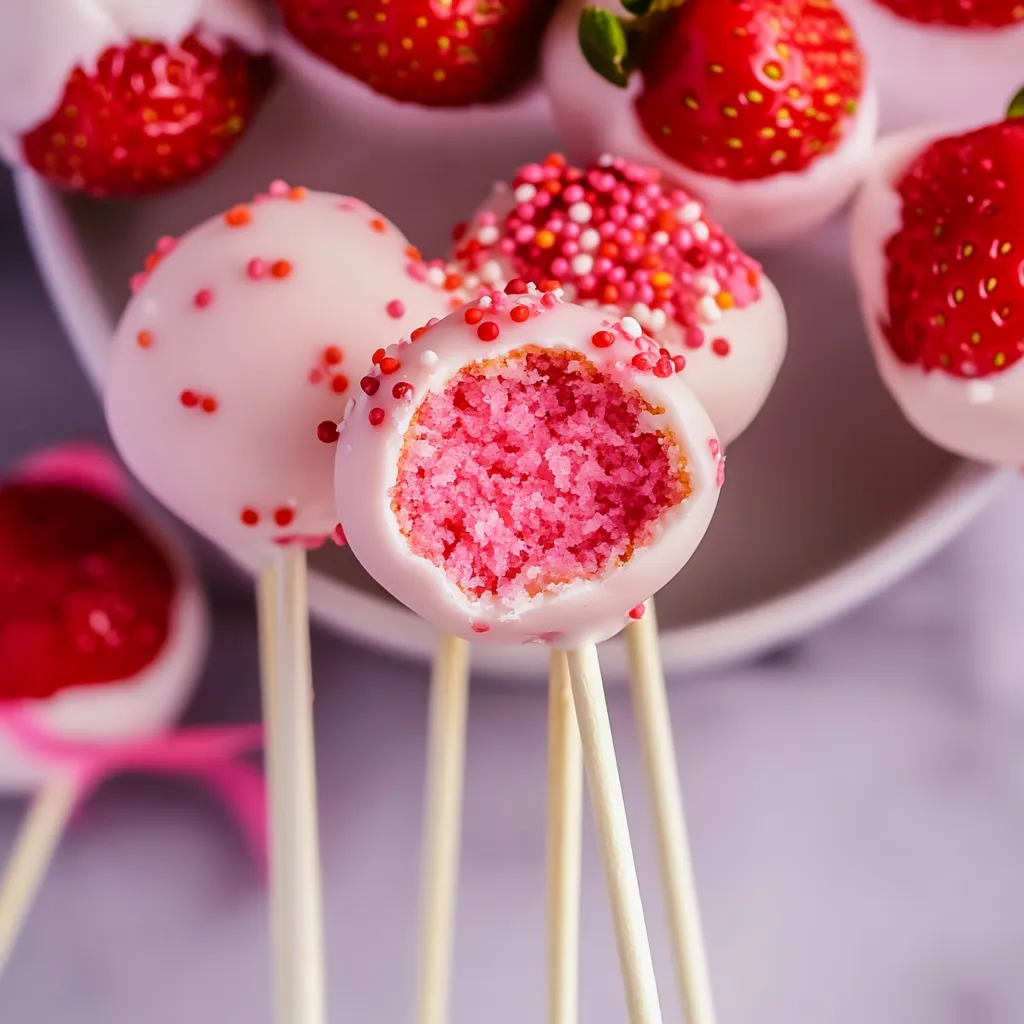
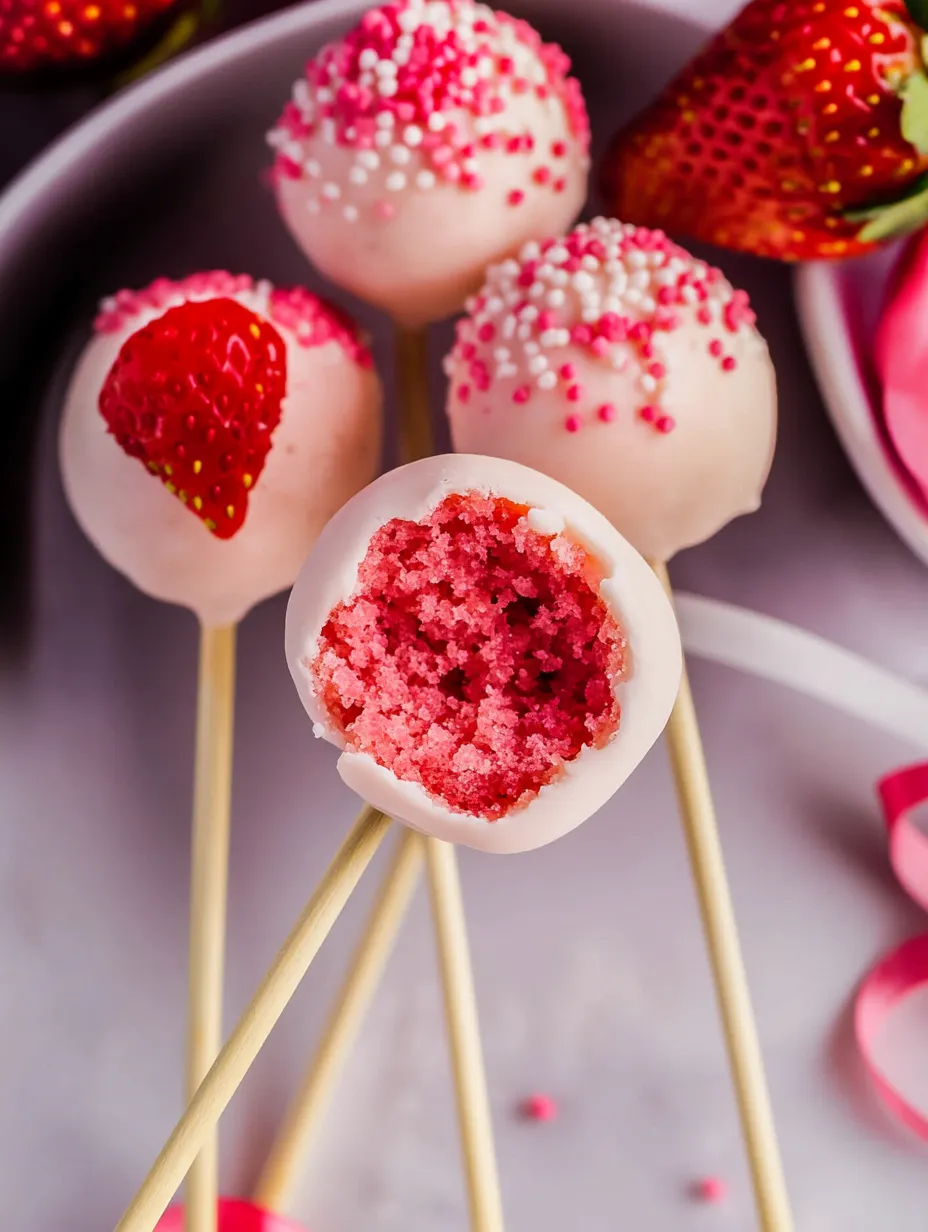
These adorable strawberry cake pops combine the sweetness of fresh strawberries with a creamy, melt-in-your-mouth center. Each bite-sized treat delivers the perfect balance of moist cake and smooth chocolate coating, creating an irresistible dessert that's both beautiful and delicious. I've mastered this recipe after countless birthday parties and holiday celebrations.
Last Valentine's Day, I made these with my daughter's class. Watching twenty kids light up as they decorated their own cake pops reminded me why these treats are so special - they bring joy to both making and eating them.
Essential Ingredients Guide
- Fresh strawberry cake mix: Creates the perfect texture and authentic berry flavor
- Quality white chocolate: Melts smoothly and sets with a beautiful shine
- Vanilla frosting: Binds the cake while adding creamy sweetness
- Food coloring gel: Provides vibrant color without affecting consistency
- Sturdy lollipop sticks: Ensures your pops stay secure while dipping
Creating Perfect Pops
- Prepare The Base:
- Crumble cooled cake into fine, even pieces. Too chunky and your pops won't hold together; too fine and they'll become gummy.
- Mix The Binding:
- Incorporate frosting gradually into cake crumbs until the mixture holds its shape when rolled. Test by squeezing a small amount - it should stick together without being sticky.
- Shape With Care:
- Roll uniform balls between your palms, applying gentle pressure. Each pop should be exactly bite-sized - about 1.5 inches in diameter.
- Coat With Precision:
- Dip sticks in melted chocolate before inserting them into chilled cake balls. This creates an anchor that prevents pops from falling off during the final dip.
My first attempt at these pops was a disaster until I learned about tempering chocolate properly. Now they're my most-requested treat for school bake sales.
Perfect Your Display
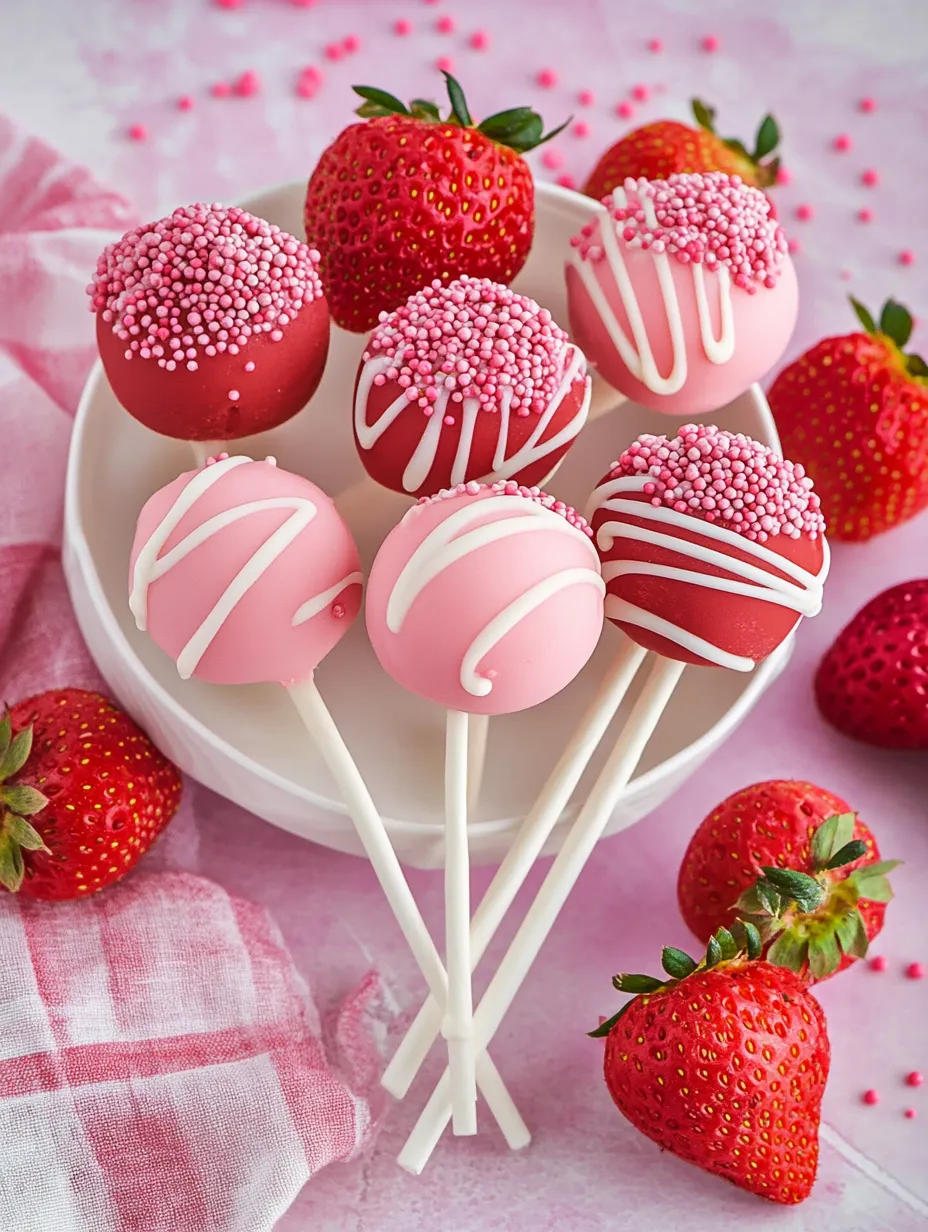
Create a stunning arrangement by varying heights and colors of your pops. Use a styrofoam block covered in decorative paper as a base, inserting pops at different levels. For gifting, wrap individual pops in clear cellophane and tie with coordinating ribbon.
 Pin it
Creative Variations
Transform these basic pops into elegant treats by experimenting with different coatings and decorations. Try marbling pink and white chocolate, adding edible glitter, or creating patterns with contrasting drizzles. For baby showers, I love doing a mix of pink and blue with pearlized finishes.
Storage Solutions
Keep uncoated cake balls in the refrigerator for up to a week. Once coated, store at room temperature in a cool, dry place for 3-4 days. Avoid refrigerating finished pops as condensation can affect the chocolate coating.
Having made thousands of these pops over the years, I've learned that patience is key. Taking time with each step - from mixing to dipping to decorating - ensures picture-perfect results that taste as amazing as they look.
Garnishing Techniques
Master the art of decoration timing - add sprinkles when chocolate is 80% set for perfect adhesion without sinking. Create professional designs using a double-dipping technique: first coat in basic white, then partially dip in pink at an angle for a modern look. For marbled effects, swirl colors together using a toothpick before dipping.
Temperature Control
Keep your workspace cool, ideally around 70°F. Work in small batches, keeping unused cake balls refrigerated. If chocolate becomes too thick, warm it gently - never exceed 90°F for white chocolate or it will seize. Use a candy thermometer for precision.
Troubleshooting Common Issues
Prevent cracking by letting pops warm slightly before dipping. If balls feel too soft, add more cake crumbs rather than frosting. For chocolate that's too thick, add paramount crystals or coconut oil in tiny increments. Fix lumpy coating by straining melted chocolate through a fine-mesh sieve.
Production Line Setup
Organize your workspace like a professional bakery: cooling station on the left, dipping station in center, and decorating area on right. Keep tools at arm's reach - damp cloth for wiping hands, spare sticks for testing chocolate consistency, and multiple sets of decorating tools to avoid color cross-contamination.
 Pin it
Scaling The Recipe
When making large batches, prepare cake balls in advance and freeze. Work with 12 pops at a time for optimal coating temperature. Calculate one standard cake mix yields approximately 48 cake pops. Double your melting chocolate estimates as some always remains in the bowl.
The perfection of cake pops lies in these subtle details that transform simple ingredients into professional-quality treats. With practice and attention to these techniques, you'll create stunning pops that rival any bakery's offerings.
Frequently Asked Questions
- → Can I make these cake pops ahead of time?
- Yes, you can make them up to 3 days ahead and store in the refrigerator. Let them sit at room temperature for 15 minutes before serving.
- → Why do my cake pops fall off the sticks?
- Make sure to dip the sticks in melted chocolate before inserting them into the balls, and chill thoroughly before coating.
- → Can I use a different flavor of cake mix?
- Absolutely! Any cake flavor works well, just adjust decorations and coating colors to match your theme.
- → How do I prevent cracking?
- Let cake pops come to room temperature before dipping in warm (not hot) chocolate coating.
- → What's the best way to store them?
- Store in an airtight container in the refrigerator for up to a week. Bring to room temperature before serving.