
 Pin it
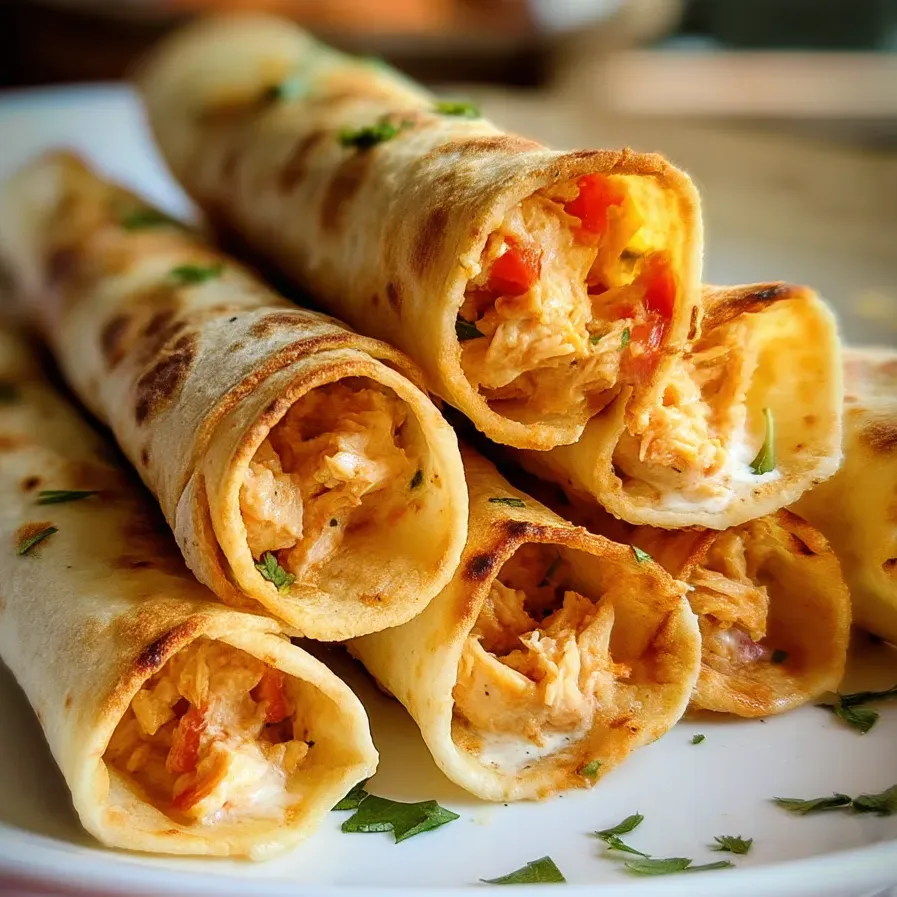
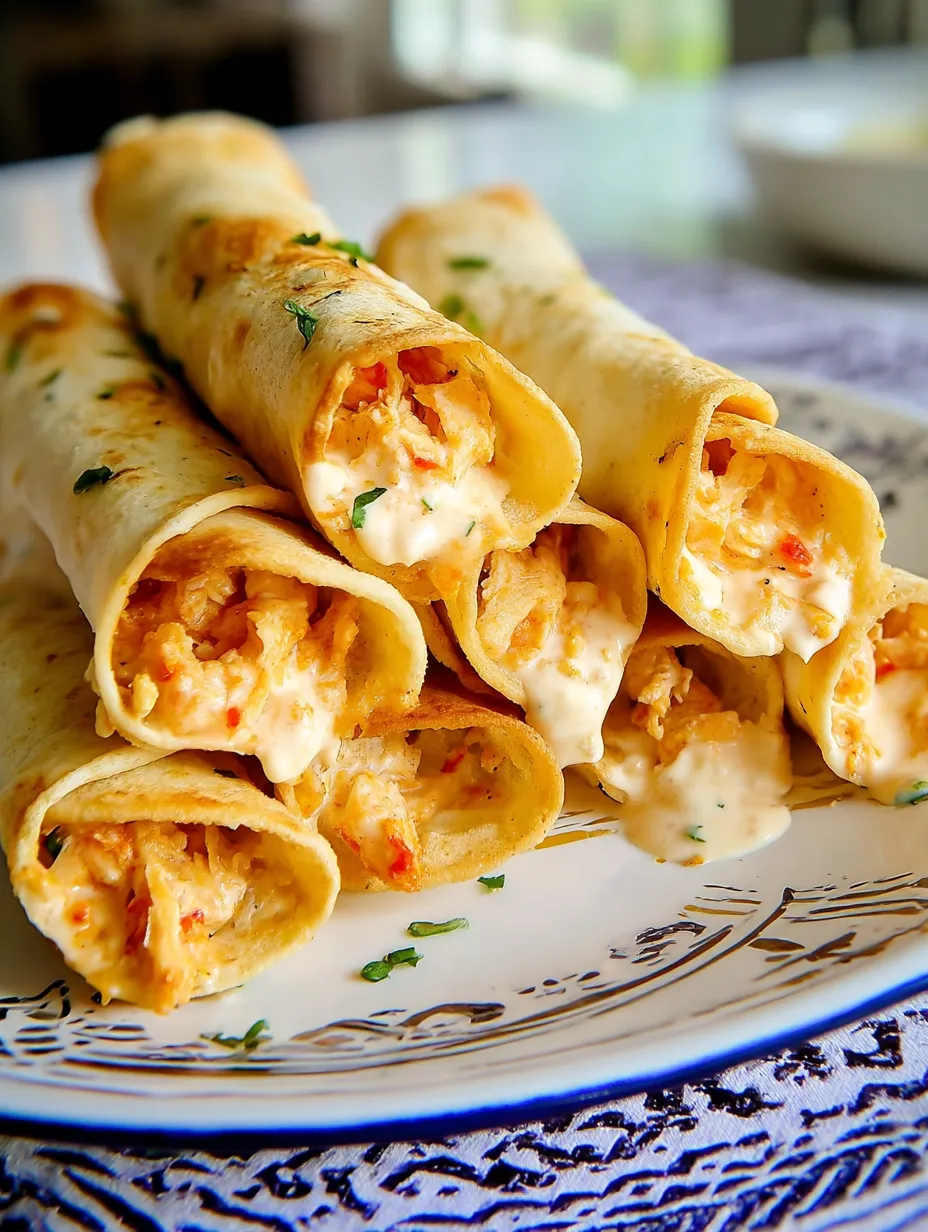
This crunchy, melty chicken taquito dish turns your day-old chicken into a crackling, crowd-favorite that hits the sweet spot between quick and homemade taste. Skip the fryer but keep all the crunch when you bake them, while the rich cream cheese stuffing makes them downright addictive.
The first batch of these taquitos happened when I needed something fast for friends watching the game and spotted leftover rotisserie chicken in my fridge. They vanished so fast I've started buying extra chicken on purpose to make twice as many. What my family can't get enough of is how the outside stays super crispy while the inside stays smooth and packed with flavor.
What You'll Need
- Pulled chicken: gives you the meaty base and works perfectly with yesterday's roast chicken or store-bought rotisserie for extra taste without extra work
- Cream cheese: brings that smooth, velvety feel that makes these taquitos stand out grab the regular kind, not low-fat, for the best melt
- Cheddar cheese: adds bite and that awesome stretch factor grate it yourself instead of buying pre-shredded for smoother melting
- Salsa: adds wetness and built-in flavor kick up or tone down the heat to match what you like
- Garlic powder: packs in savory punch without dealing with fresh cloves
- Onion powder: gives you all the flavor without crunchy bits of raw onion
- Cumin: brings that classic warm Mexican taste warm it in a pan first for even bigger flavor
- Flour or corn tortillas: work as your crunchy wrapper go for the 6-inch ones for just the right size
- Cooking spray: helps them brown evenly without drowning in oil
Simple Cooking Steps
- Get your oven ready:
- Crank your oven up to 425°F to create the perfect crisping zone without burning your taquitos. Cover your baking sheet with parchment so nothing sticks and cleanup's a breeze. This step makes sure your rolled-up goodies won't glue themselves to the pan.
- Create your stuffing:
- Throw your chicken shreds into a bowl with soft cream cheese, grated cheddar, and your favorite salsa. The key here is making sure that cream cheese isn't cold, or you'll end up fighting lumps. Sprinkle in your spices and stir everything until the cream cheese wraps around all the chicken bits evenly.
- Get those tortillas ready:
- Warm up your tortillas so they roll without cracking. Cold ones will just split open and spill all your filling. Just wrap them in a damp paper towel and nuke them for about half a minute – they'll get bendy without turning soggy.
- Roll 'em up:
- Spoon about 2-3 tablespoons of your mix in a line near the bottom edge of each tortilla. Don't go overboard or they'll bust open in the oven. Roll them up tight from the filled side, keeping it snug as you go to make a firm little log. Lay each one seam-side down on your baking sheet so they don't unravel.
- Get them ready for the heat:
- Give each taquito a light coat of oil with a brush or spray, which helps them turn that beautiful golden color. Make sure you hit the edges and ends since those dry out first. This thin oil coating is what turns them from pale and soft to golden and crunchy.
- Brown them up:
- Stick the taquitos in your hot oven for about 15-18 minutes until they turn that gorgeous golden brown with crispy edges. Put the baking sheet right in the middle of your oven for the most even cooking. When the filling bubbles a bit at the ends, you'll know they're heated all the way through.
- Cool and dig in:
- Let them sit for a couple minutes after they come out of the oven. This quick break lets the super-hot filling settle down so you won't burn your mouth. It also makes them easier to pick up. Set them out with some dipping options for everyone to choose what they like.
 Pin it
I honestly think cream cheese is the game-changer in this recipe. I stumbled on using it when I was short on ingredients and needed to make my chicken go further. Now I can't imagine making them any other way. The cream cheese gives you this smooth, silky texture that keeps everything together while adding richness that works perfectly against the crunchy tortilla outside.
Prep Them Early
These taquitos are fantastic for getting a head start on meals. You can roll them all up, put them on a baking sheet, wrap with plastic, and keep them in the fridge for up to a day before cooking. When you're ready to eat, just pull them out while your oven warms up, give them a brush of oil, and bake them as usual – just add 2-3 extra minutes since they'll be cold. If you want to store them longer, freeze the rolled-up uncooked taquitos on a tray, then once they're solid, dump them in a freezer bag. When it's time to cook, you can bake them straight from frozen – just add about 5-7 extra minutes.
Mix It Up
The standard version works great, but you can tweak it a million ways. Want them spicy? Throw in some chopped jalapeños or a few splashes of hot sauce. Looking for more depth? Add some fresh cilantro, lime zest, or a spoonful of that sauce from canned chipotle peppers. Try a green version by swapping in salsa verde instead of red salsa and using Monterey Jack instead of cheddar. You can even make morning taquitos by using scrambled eggs and breakfast sausage instead of chicken.
What To Eat With Them
While these taquitos are killer just as snacks with some dips, they also make an awesome full dinner with the right sides. Pair them with some Mexican rice and refried beans for that restaurant feel at home. A simple cabbage slaw with lime juice and cilantro cuts through the richness of the filling. For a fun family-style setup, arrange your taquitos on a big plate surrounded by little dishes of toppings like bright pink pickled onions, chunky avocado bits, and crumbly cotija cheese, so everyone can dress up their own plate.
 Pin it
Frequently Asked Questions
- → Can I prepare these wraps in advance?
You sure can! Make the filling and roll the wraps up to a day ahead. Keep them covered in the fridge. When it's time to bake, brush them with oil and pop them in the oven. You can also freeze the unbaked wraps for up to 3 months. Just bake them straight from frozen, adding a few extra minutes.
- → What's the best way to warm up leftovers?
For crispy results, use an oven or toaster oven at 350°F for about 10 minutes. An air fryer works too at the same temp for 3-4 minutes. A microwave is faster (1-2 minutes), but you'll lose that crunch on the tortilla.
- → Can I switch to corn tortillas?
Definitely! Corn tortillas give you a more traditional feel and are naturally gluten-free. Warm them up first so they don't crack. Wrap them in damp paper towels and microwave for 20-30 seconds, or toss them in a hot skillet for a few seconds to make them flexible.
- → How do I add more spice to these wraps?
Spice things up with hot salsa in the mix, diced jalapeños, or a splash of your favorite hot sauce. You can also toss in 1/4 to 1/2 teaspoon of cayenne. Serve with spicy salsa for extra kick so folks can adjust the heat themselves.
- → What sides go well with these wraps?
Pair them with Mexican rice, refried or black beans, or a simple green salad with a tangy cilantro-lime dressing. For extra flair, add guacamole, pico de gallo, and charred street corn to the table.
- → Can I use something other than chicken?
Absolutely! Shredded beef, pork, or even cooked ground meat work great. Want a veggie option? Swap the chicken for black beans, pinto beans, or a mix of sautéed veggies like zucchini, bell peppers, and corn. Keep the cream cheese for that signature creaminess.