
 Pin it
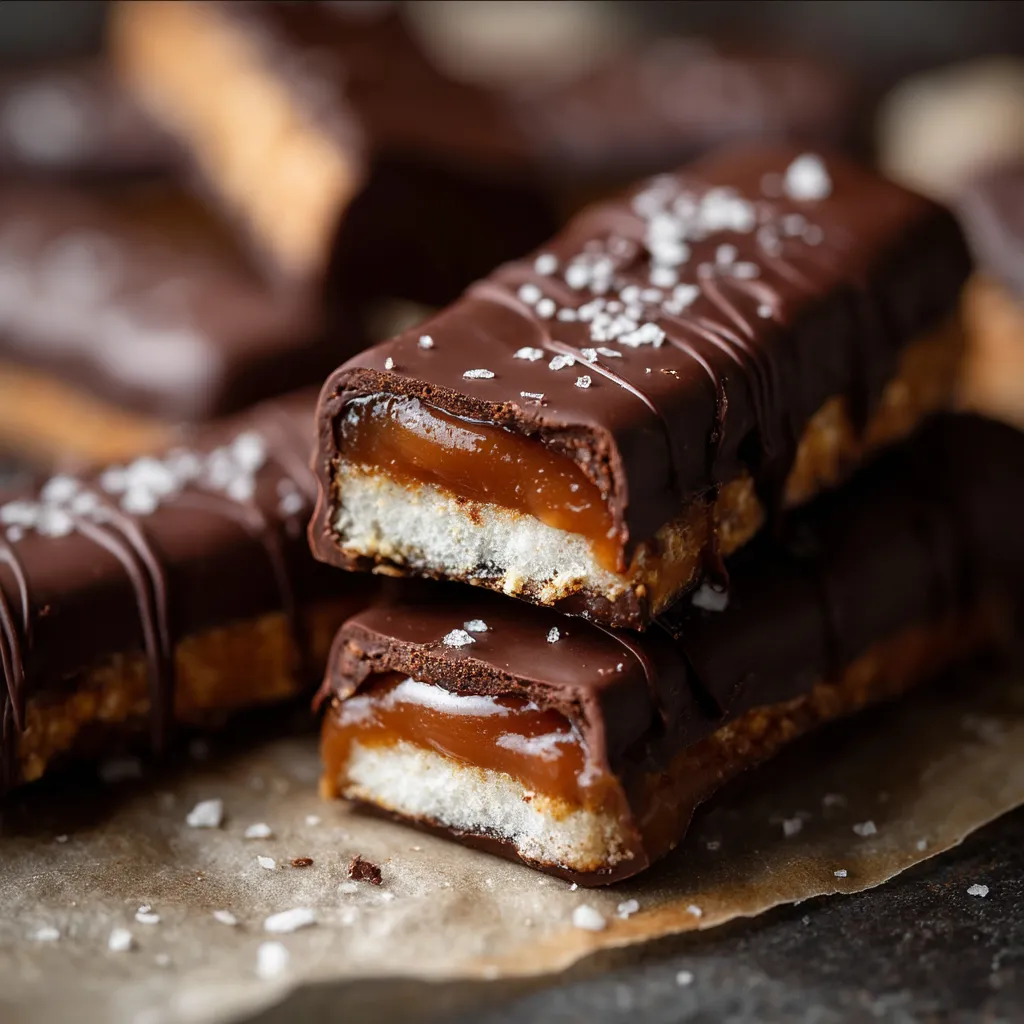
This DIY wheat-free Twix copycat turns junk food into a better-for-you snack without losing that yummy chocolate, caramel and cookie combo we can't resist. My adventures testing healthier sweets led to this winner that handles sugar cravings while using good-for-you stuff.
I whipped up these bars when I needed something my friend who can't eat gluten could enjoy at our book gang meetups. They were gone in seconds and now everyone bugs me to bring them to every single get-together.
What You'll Need
- Almond flour: makes a fantastic cookie bottom with rich taste without wheat. Try to grab the blanched fine kind for the best texture.
- Butter: gives that real shortbread taste. Grass-fed adds more flavor if you can find it.
- Maple syrup: adds sweetness the natural way. Skip the fake breakfast stuff and go for the real deal.
- Vanilla extract: makes everything taste better. The real stuff makes a big difference.
- Creamy peanut butter: works magic for the gooey middle layer. Pick a natural one without extra junk added.
- Chocolate chips: create that must-have outer shell. Dark ones with at least 70% cacao taste the most grown-up.
- Coconut oil: helps chocolate break with that perfect crack. Get refined if you don't want any coconut taste.
How To Make These Treats
- Get ready:
- Heat your oven to 350°F and put parchment in your pan with extra hanging over the sides. This trick lets you pull everything out easily when you're done.
- Make the cookie base:
- Mix your almond flour, melted butter, maple syrup, vanilla, and salt until it looks like damp sand that sticks when you squeeze it. Press it down firmly and evenly with your fingers or a flat-bottomed cup.
- Cook the base:
- Stick the pan in the middle of your oven for 10 minutes if you want it soft or 12 if you like it crunchy. The sides should turn slightly gold while the middle stays lighter. Let it cool all the way before moving on.
- Fix the fake caramel:
- In another bowl, mix peanut butter, maple syrup, vanilla, and almond flour until it's smooth and thick. The flour helps it get firm so it won't ooze everywhere.
- Build and chill:
- Spread your peanut butter mix over the cooled cookie using a flat knife to make it smooth. Pop the whole thing in the freezer for at least an hour until the top feels hard when you touch it.
- Melt the chocolate:
- Put a bowl over a pot with a bit of simmering water. Add your chocolate chips and coconut oil, keep stirring until it's all melty and shiny. Or just zap it in the microwave for 30 seconds at a time, stirring between each blast.
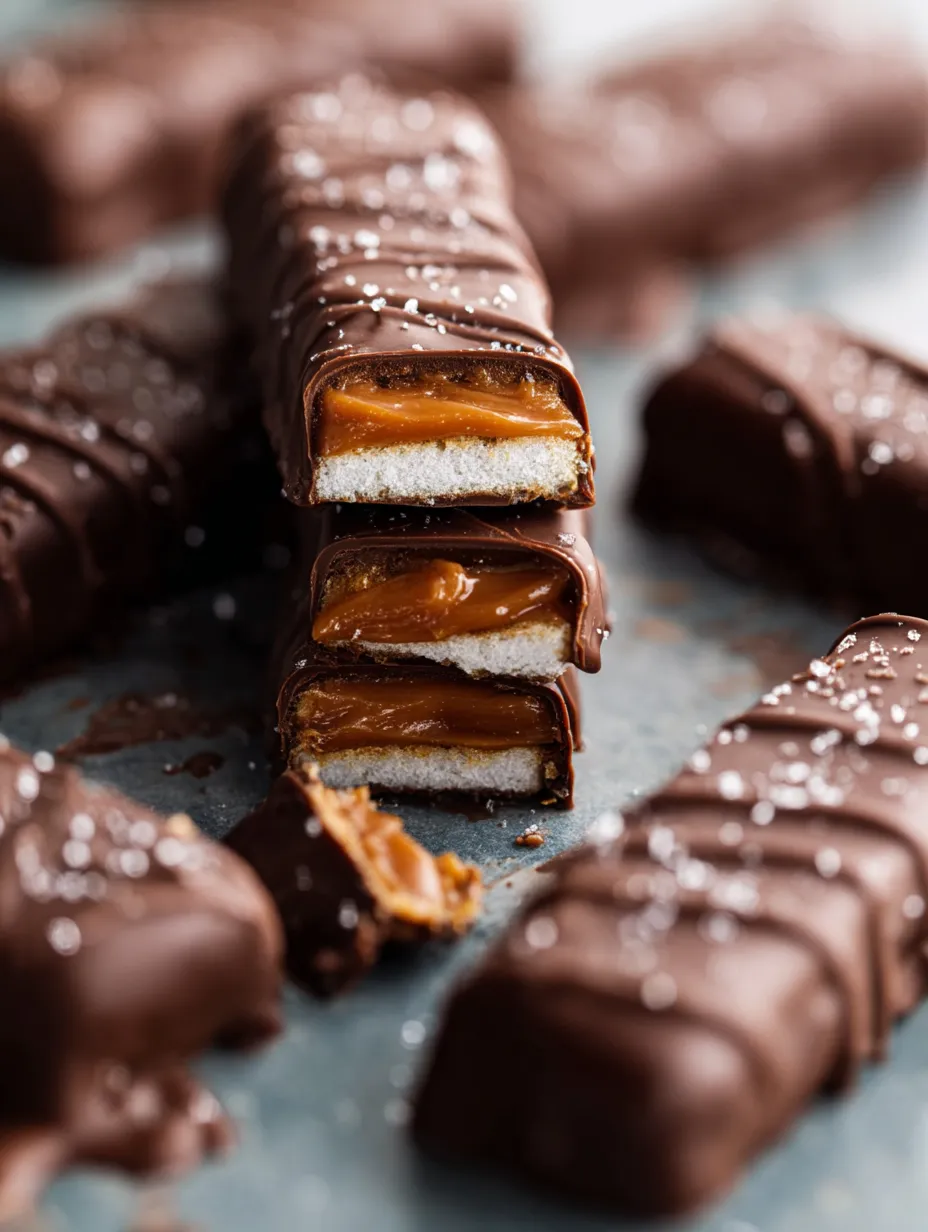
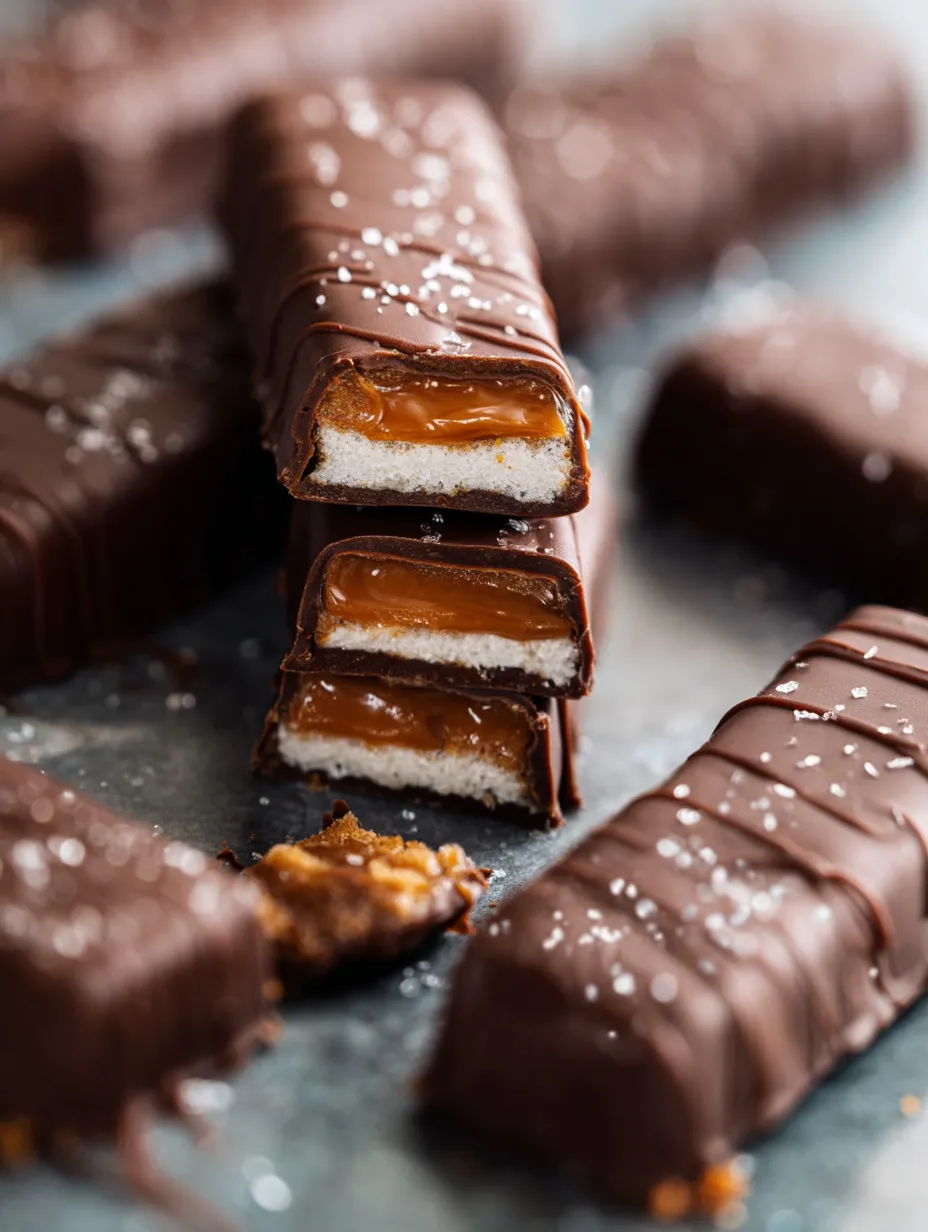
- Slice and coat:
- Take your cold bars from the freezer and lift them out using the parchment edges. Cut into 16 even pieces with a sharp knife. Dunk each piece in chocolate using two forks to handle them, let extra drip off before putting on parchment paper.
- Finish them off:
- For a fancy look, drizzle leftover chocolate in zigzags on top and add a tiny bit of flaky salt if you want. Put them back in the freezer for 10 minutes so the chocolate gets hard and snappy.
 Pin it
That peanut butter middle layer really makes these stand out. My kid once told me these beat the real candy bars, which made me feel like a superhero mom. Sometimes I throw in a tiny bit of cinnamon in the cookie part for a surprise twist.
How To Keep Them Fresh
These DIY candy bars need the right storage to stay amazing. Keep them in a sealed container in your fridge where they'll last up to two weeks with a crisp bottom and chewy middle. If you want them around longer, wrap each bar in parchment and put them in a freezer container for up to three months. Let the frozen ones sit out about 10 minutes before eating for the best taste and feel.
Easy Swaps
You can change up this recipe lots of ways depending on what you like or have at home. Sunflower seed butter works great for folks who can't eat nuts. Try coconut sugar instead of maple syrup in the cookie layer for a deeper flavor. If you can't do dairy, use coconut oil in place of butter for the cookie base. People doing keto can swap the maple syrup with monk fruit sweetener and grab sugar-free chocolate chips for the outside.
Ways To Serve Them
Take these bars from basic snacks to fancy desserts with a few simple touches. Serve them cool on a wooden board with some cacao bits sprinkled around for a casual dessert spread. For special times, put one bar on a small plate with a spoonful of whipped coconut cream and some fresh berries. They taste awesome with afternoon coffee or tea, especially a nutty rooibos that goes well with the flavors. For a super treat, warm a bar for 10 seconds in the microwave and add a scoop of vanilla ice cream.
 Pin it
Frequently Asked Questions
- → Can peanut butter be swapped out in this recipe?
Totally! If you'd prefer or need a change, almond butter, cashew butter, or sunflower seed butter all work great. Each option adds a little uniqueness to the flavor while keeping the same creamy texture you'll want.
- → How long do these last in the fridge or freezer?
Stored in a sealed container, they'll stay fresh in the fridge for about 7 days, or up to 3 months if kept in the freezer. Chilling keeps the layers nicely set and the chocolate from melting prematurely.
- → Can I make these vegan-friendly?
You bet! Swap the butter for coconut oil or a plant-based alternative. Double-check your chocolate is vegan-friendly; lots of dark chocolates already are but check labels to be safe.
- → Which chocolate melts best for coating?
Semi-sweet or dark chocolate is your go-to for that perfect balance with the sweetness inside. Milk chocolate works too if that's your thing. Look for good-quality chocolate chips or bars that melt smoothly for easy dipping.
- → Why should I pop the bars in the freezer before coating?
Freezing keeps the whole bar firm, which helps when you're dipping in chocolate. The cold also ensures the chocolate hardens faster, and you won't end up with messy layers falling apart.
- → Any tips for cleaner chocolate dipping?
Tidy dipping is easy if you use forks to lift each bar, letting the extra drip off. Gently tap the fork on the bowl's edge to shake off the extra. Chocolate tools or even a drizzle can work if covering doesn’t seem doable.